
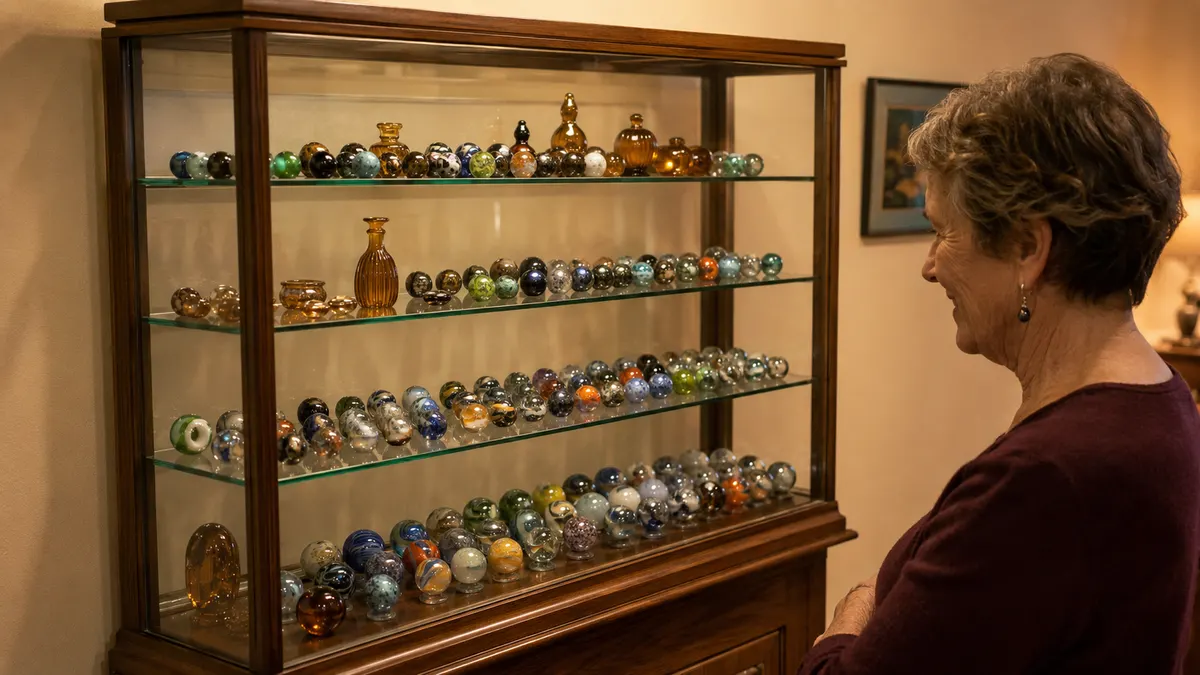
A marble collection is easy to hide and hard to show. You can keep everything in lined boxes and know it is safe, but then you never actually look at the pieces, and a collection that never gets seen stops being a collection. The trouble is that the moment you bring fragile glass out into a room, you are up against dust, grime, curious hands, and the light itself. I have run this shop with Ruth for years, and I have ruined my share of fine pieces learning what an open shelf does not protect.
After a long season of trial and error, I have settled on a straightforward answer: put the fragile stuff behind glass doors, on tiered shelves you can light and control, and arrange it the way I lay out below. A four-tier glass display cabinet gives a collection room to breathe while it keeps off the dust and stops the everyday accidents. In this guide I will walk you through the whole arrangement, shelf by shelf, the way I set up the BROTTAR cabinet Ruth and I keep in the back of the shop. If you follow the order, you will not overload a shelf, you will not cook your glass in bad light, and every piece will be reachable without risking its neighbors.
The 4-tier glass cabinet that finally gave my glass a home
A four-tier curio cabinet with glass doors and built-in lighting keeps dust and curious hands off the collection while it lets you arrange fragile pieces the way a proper display deserves.
Amazon Check Today's Price on Amazon →Step 1: Plan the cabinet by weight and size, not by looks
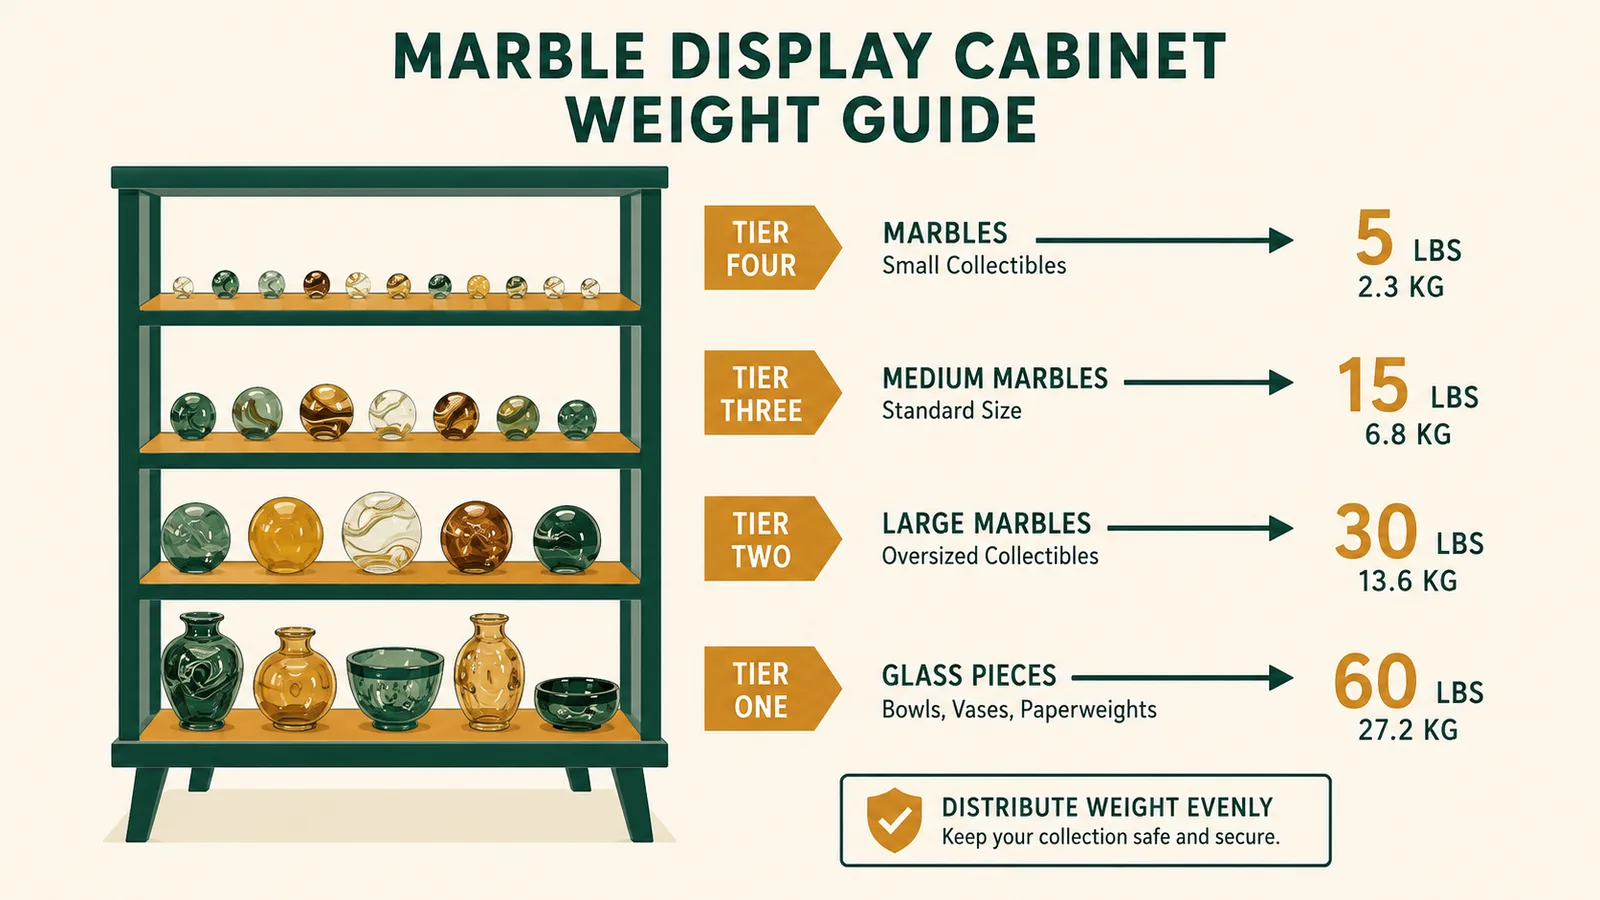
The temptation is to arrange by color or by beauty, putting your favorite marbles front and center on the eye-level tier. Resist that for a moment. The rule that saves the most glass is weight down low, delicates up high, and that is where you start. In a four-tier cabinet the bottom shelf is the workhorse: it carries the heaviest pieces, the big shooters, the thicker glassware, anything that would be a hard fall and a bad break if it dropped. The upper tiers take the lightweight marbles and the small, valuable pieces you want at eye level.
On the BROTTAR cabinet I work from the sturdiest shelf upward, and I do not pack any single tier to its edge. A shelf that sits flat and half full is safer than one that is jammed to the front. Before you place a single piece, take everything you mean to display and sort it into four rough groups from heavy to light. That little bit of sorting in the beginning is what keeps a shelf from bowing and keeps a heavy glass piece from sharing a tier with a fragile marble that should never take that weight.
Sorting the pieces before you place them also tells you, honestly, how much room the display needs. I have seen collectors buy a four tier assuming it is endless, then stale halfway through because they never counted what they actually own. Do that count before the cabinet arrives. If you have more than fits comfortably at one piece per slot with a finger of air between, keep the overflow in lined boxes rather than crowding the case. A half full cabinet beats a jammed one every time, and it looks better doing it.

Step 2: Line the shelves so nothing sits on bare glass or wood
Whatever the shelf is made of, glass marbles and glassware both scratch the surface they rest on, and the surface scratches them back. Over months, a marble that sits directly on a bare shelf develops a dull, hazy spot on its underside where the two surfaces have worked against each other. I line every tier in my display cabinet with a thin felt or cork runner before I put anything down. It is the cheapest insurance in the whole setup and it does two jobs: it stops the scratching and it stops the rolling.
The lining matters more than people think because glass pieces do not always stay where you set them. A small glass vessel or a round shooter can shift with a bumped floor and travel toward the edge. Felt gives it a little grip and slows that slide. I cut my runners to fit each tier exactly, right up to the back and sides, so there are no bare gaps that catch dust or let a piece work its way under the liner and tip. Keep the runners flat and they are easy to lift out and wash every season. A liner that is too thick lifts a small marble off its seating and lets it roll; too thin and it does not hold. I test each tier by setting a handful of the smallest pieces on it the first day and watching whether any of them shift when I brush the door. Twice I added a second layer; once I pulled one out. Felt is allowed to be fiddled with, and that is its whole point.
Step 3: Give every piece its own spot with room to reach in
The quiet killer of a glass display is overcrowding. When marbles and small glassware sit right against one another, the whole tier becomes a single hazard: to pull out the piece you want, you have to drag three others with it, and that is how fine glass gets chipped and dropped. I leave a clear finger's width, sometimes more, between every piece on a tier. Yes, it means you display fewer pieces. That is the point. A display is not a storage jar; it is a selection, and your best pieces deserve the room.
I do not line pieces side by side like a parade either. A slight difference in height reads as life where an even row reads as a shop window, and for fragile glass variety in the line is also safer than uniformity, because nothing wants to lean on anything else. Group a few tall pieces together at the back of one tier and give the front a scattering of the smaller, rounder things, and the tier does the talking for you. You still see every piece, but you see it as part of a composition.
You reach for your favorite pieces more than any other, so put tomorrow's most-handled marbles nearest the door and slightly forward, where your hand can get to them without reaching over glass. The decorative pieces that stay put can sit deeper and toward the back. In the BROTTAR cabinet the door swings open to the full interior, which makes this easier than on a shallow hutch, but the habit is the same everywhere: reachable pieces in reach, sit-still pieces in the back, and always a clear lane of felt between what you will grab and what would fall if you missed.
Step 4: Control the light so the glass shows its color, not its glare
This is the step most people get wrong, and it changes everything about how a display looks and lasts. Strong, steady sun on a cabinet of glass will, over a season, dull the polish on the marbled pieces and yellow the fittings, and it turns the whole cabinet into a glare that hides the interior color you bought the pieces for. So the first rule is placement: set the cabinet against a wall that gets soft, indirect light, and never in the path of a harsh afternoon window.
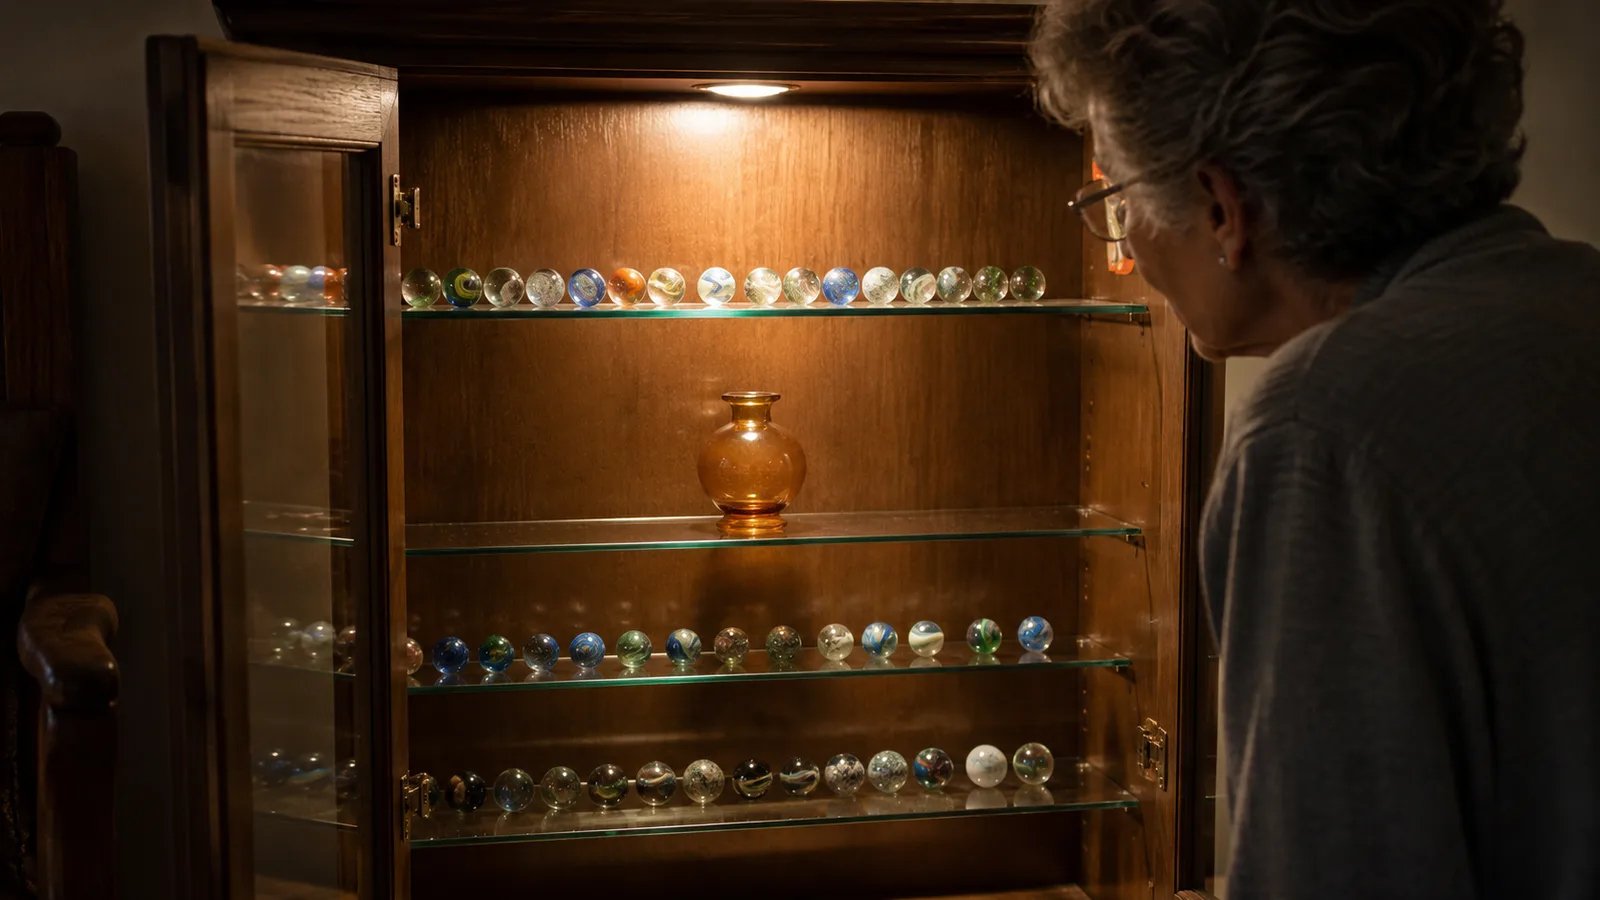
Then work with the cabinet's own lighting rather than fighting it. The BROTTAR cabinet has built-in lights with a few color settings, and I have learned to keep them warm and low, just enough to read the swirls inside a marble and the curve of a small glass piece without washing the color out. Light from above and slightly in front drops your reflections low so you see into the glass instead of off it. If the light looks harsh, turn it down or switch to the warm setting. A display reads best when the glass feels like it is glowing from within, not spotlighted.
Step 5: Build the eye so the tier leads the eye to your best piece
Once the weight, the lining, the spacing, and the light are settled, the last step is the arrangement itself, and this is the enjoyable part. I build each tier like a small scene with a single focal point. On the middle tiers, where the eye lands first, I place my best single piece, a favorite shooter or a small amber glass vessel, centered and alone so it reads clearly. Then I frame it with the quieter pieces, the leftover cat's eyes and minor glassware that fill in around it without competing.
I keep rows shallow and straight rather than packing a tier, because a long, clean line of marbles shows the profile of each one and lets the light catch every piece in turn. I do not crowd the back against the rear panel; a little depth behind the front row gives shadows somewhere to fall and makes the whole tier feel airy instead of stuffed. Build the bottom tier as a sturdy base, keep the top tiers for the dainty pieces, and let the middle carry the hero piece that stops a visitor in the doorway.
What Else Helps
A thin pair of cotton gloves is worth keeping near the cabinet for the pieces you handle often, because the oils from your hands leave faint marks on glass that show up under any light. I also keep a small jewelry-grade cloth inside the bottom drawer to wipe a piece before it goes back in. Rotate the collection every few months: put the pieces that have had a long turn back in their lined boxes and bring out others, which keeps the display feeling alive and spreads the light exposure around so no single piece sits in the cabinet forever.
There is also the matter of dust between the glass panes. Even behind a door, the tiniest film gathers over weeks, and it shows more against the light than you would think. I keep the lining runners and the feel of the shelves honest by wiping them with a soft dry cloth once a month, and I fold the cloth under my palm so no jewelry ring comes near the glass. Small habits, but they keep a great display from slowly fogging.
And be honest about what a glass cabinet does not do. It protects against dust, curious hands, and everyday bumps, but it cannot stop a dropped piece once it is in your hand, and it will not save a shelf you overload. The cabinet earns its keep by giving fragile glass a stable, light-controlled home. The careful arranging is still on you, the same as it has always been. If you want the fuller picture of how this cabinet has held up over a year of daily display work, read my long-term review before you decide.
Weight down low, delicates up high, a finger's width between every piece, and warm low light. That arrangement has kept my glass whole longer than anything else I have done.
Give your collection a stable, light-controlled home behind glass
A four-tier glass display cabinet with built-in lighting and a proper layout is the difference between a weathered box of loose glass and a collection you are actually proud to show. Arrange it shelf by shelf the way I laid it out here.
Amazon See Today's Price on Amazon →